Navigating the India eVisa Application Process: A Comprehensive Guide
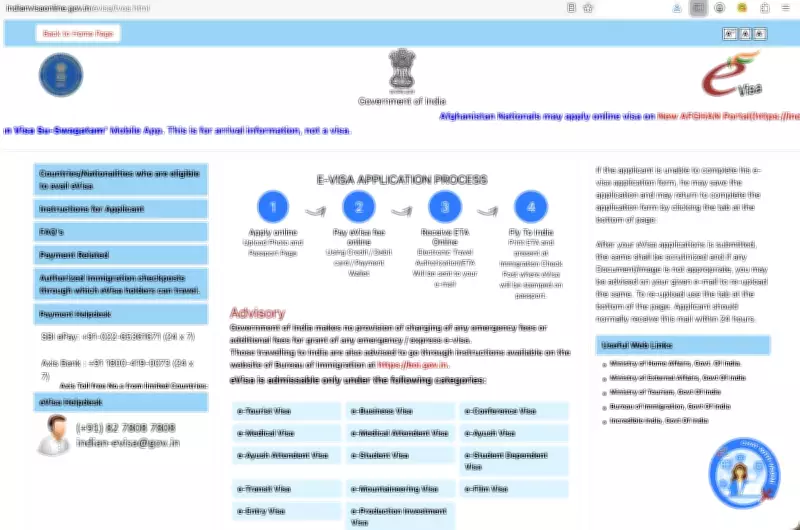
For travellers planning a trip to India, securing the tourist eVisa online is a mandatory step that requires careful attention and preparation. The process involves using the official website to avoid numerous scam sites that can mislead applicants. The correct and only website to use is indianvisaonline.gov.in/evisa/tvoa.html. Upon accessing this site, users should first close a pop-up window labeled "e-Production Investment Visa" by clicking the CLOSE button in the top right corner, as the visa application page is located beneath this.
Preparing Your Application: Key Steps and Requirements
To ensure a smooth application, it is highly recommended to start by clicking on the "sample e-visa application" link, found in the instruction boxes at the bottom of the page. This sample can be studied thoroughly and even downloaded as a PDF for offline review. The adjacent box, second from the left, is where applicants initiate the actual eVisa application. The sample provides a complete overview of all the information required, making it essential to have everything prepared beforehand to avoid delays or errors.
When applying, travellers will need to provide specific details and documents. Here is a list of key requirements:

- Full travel details, including arrival and departure dates, and the address of the first night's accommodation.
- Most tourists should select the "eTOURIST VISA" option during the application.
- For mobile numbers, use 0061 instead of +61 as the prefix.
- When entering addresses, avoid commas and use spaces between words, such as "Glyde Street Mosman Park".
- Details for both parents, including their places of birth, are mandatory.
- If you have visited India previously, list all cities and provide an address from a past trip.
- A "Reference Name in India" with their address and phone number is required; this should be someone based in India, as using a travel agent's details may lead to rejection.
- Upload a square JPG passport photo (10kb to 1MB) with a direct front-facing view and pure white background; removing shadows and lightening the image can improve acceptance.
- Upload a PDF of the passport information page (10kb to 300kb); JPGs can be converted online using free tools like ilovepdf.com/jpg_to_pdf.
Application Tips and Final Steps
It is advisable to complete the application from a laptop or desktop computer for better usability, with the JPG and PDF files readily accessible on the desktop. After thoroughly reviewing the sample, return to the website and click "Apply here for e-visa" to begin. The form allows saving a partially filled application via the "complete partially filled application form" button, but preparing all information in advance and submitting in one go is more efficient.
Once the form is completed, proceed to payment by selecting SBIePay. The fees vary by season: a 30-day eVisa costs US$10 (approximately $14 AUD) for entries from April to June, and US$25 (around $35 AUD) from July to March. After submission, applicants can check their visa status on the same web page using the application number provided.
This guide emphasizes the importance of using the official site and careful preparation to navigate the India eVisa process successfully, ensuring a hassle-free travel experience to this vibrant destination.